
Nemesis: Zero to Hero
What is Nemesis?
Nemesis is an offensive data enrichment pipeline that is designed to help operators with common tasks on engagements. It can ingest structured data produced during offensive security engagements, process it, and give insights about the data including identifying vulnerabilities, credentials, and metadata about the output.
According to the README it’s aim is to automate a number of repetitive tasks operators encounter on engagements, empower operators analytic capabilities, and collective knowledge, and create structured and unstructed data stores of as much operational data as possible to help guide future research and facilitate offensive data analysis.
Why are you writing this?
If you take a look at the setup instructions it can look a bit intimidating. So I wanted to write a no-frills guide that outlines exactly what commands to run in order to get a basic Nemesis setup running. Just run the commands exactly as I outlined, and you’ll have a Nemesis server you can connect to your favorite C2 platform.
Instructions
Docker
sudo apt update && sudo apt install git curl -y

sudo mkdir /etc/apt/keyrings/ 2>/dev/null

curl -fsSL https://get.docker.com -o get-docker.sh

sudo sh get-docker.sh

sudo apt-get install -y docker-compose

# Allow your user to run docker w/o being root
sudo usermod -aG docker <user>
Next logout of your shell and log back in, we’ll go ahead and confirm docker can be run as a non-root user
docker ps

Kubectl
curl -LO "https://dl.k8s.io/release/$(curl -L -s https://dl.k8s.io/release/stable.txt)/bin/linux/amd64/kubectl"

sudo install -o root -g root -m 0755 kubectl /usr/local/bin/kubectl

kubectl version --client

Kubernetes
Next we need to install Kubernetes
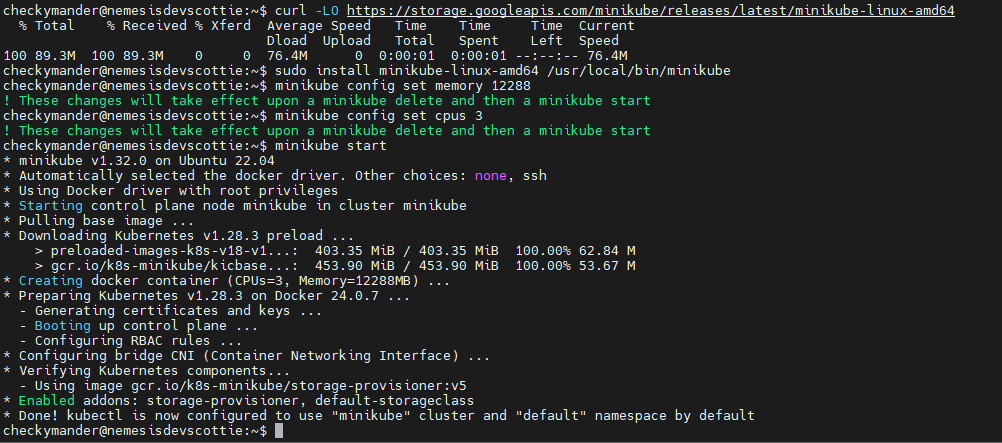
curl -LO https://storage.googleapis.com/minikube/releases/latest/minikube-linux-amd64

sudo install minikube-linux-amd64 /usr/local/bin/minikube

minikube config set memory 12288

minikube config set cpus 3

minikube start
Now let’s make sure it’s working as expected, you can probably skip these steps but it never hurts to make sure.
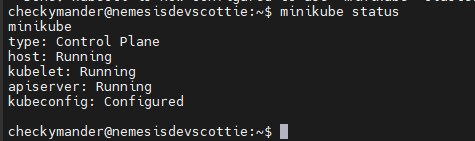
First we check the status to make sure it’s up:
minikube status
Next we can go ahead confirm we’re running the right version, it should be greater than 1.26
minikube version

Now let’s run a few commands on the host to make sure it has internet access:
# First log into minikube
minikube ssh

# Next let's ping an IP we know should be live
ping -c 4 1.1.1.1

# finally let's just confirm DNS resolution
nslookup google.com
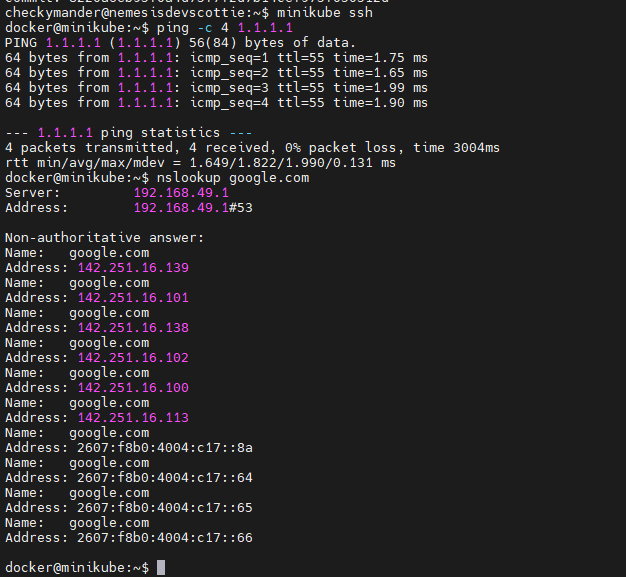
If all these work, we can move onto the next step!
Helm
curl https://baltocdn.com/helm/signing.asc | gpg --dearmor | sudo tee /usr/share/keyrings/helm.gpg > /dev/null

echo "deb [arch=$(dpkg --print-architecture) signed-by=/usr/share/keyrings/helm.gpg] https://baltocdn.com/helm/stable/debian/ all main" | sudo tee /etc/apt/sources.list.d/helm-stable-debian.list

sudo apt-get update

sudo apt-get install -y helm
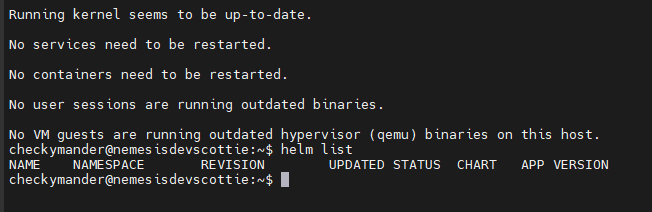
You can confirm it’s working by running the command:
helm list
Skaffold
skaffold config set --global collect-metrics false
Next we’ll need to update your ~\.bashrc file, we’ll just add all the lines we’re going to add now don’t worry about errors for now. Just add the following lines to the bottom of your ~\.bashrc file
export SKAFFOLD_UPDATE_CHECK=false

export PYENV_ROOT="$HOME/.pyenv"
command -v pyenv >/dev/null || export PATH="$PYENV_ROOT/bin:$PATH"
eval "$(pyenv init -)"

export PATH="$HOME/.local/bin:$PATH"
Next we’ll just reload it you can do this by either logging out and logging back in or running this command:
source ~\.bashrc
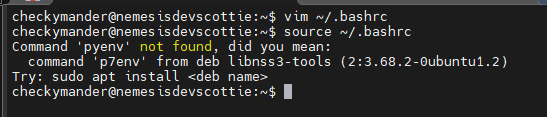
You’ll see an error about pyenv not being installed, don’t worrry, we’ll resolve that in a minute.
Python, PyEnv, and Poetry
Nemesis was coded specifically with Python 3.11 in mind, so we’re going to go ahead and make sure we’re using the right version. In addition, it uses PyEnv and Poetry for it’s package management so we need to install those also.
# Install prerquisites for pyenv
sudo apt update; sudo apt install build-essential libssl-dev zlib1g-dev \
		libbz2-dev libreadline-dev libsqlite3-dev curl \
libncursesw5-dev xz-utils tk-dev libxml2-dev libxmlsec1-dev libffi-dev liblzma-dev

# Install pyenv
curl https://pyenv.run | bash
We’ll want to re-load our bash profile again, this time those errors should be resolved
source ~.\bashrc

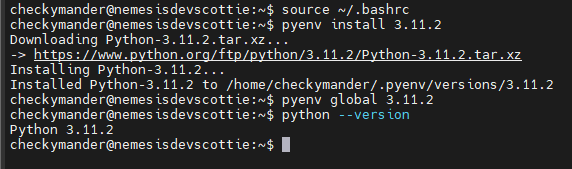
Next we’ll setup our python environment
# Install Python 3.11
pyenv install 3.11.2

# Set our active Python version to 3.11
pyenv global 3.11.2
Next confirm that worked by running the following:
python --version
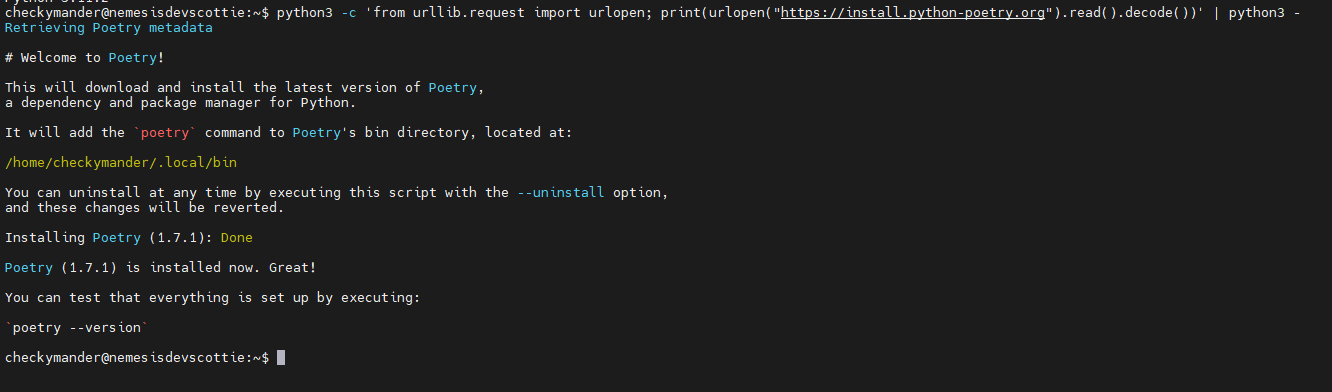
Now that Python is ready to go, let’s set up Poetry
python3 -c 'from urllib.request import urlopen; print(urlopen("https://install.python-poetry.org").read().decode())' | python3 -
Nemesis
Finally, we’re done with the pre-requisites, and we can get to the actual Nemesis setup.
First grab the Nemesis repo:
git clone https://github.com/SpecterOps/Nemesis
We’ll need to install one of the enrichment commands first, since Nemesis relies on it:
cd Nemesis/

poetry -C ./cmd/enrichment/ install

Next install some pre-requisites that the nemesis-cli.py script requires:
pip3 install boto3 vyper-config passlib
Next let’s configure Nemesis, luckily for us it comes with an example config file we can start from
cp nemesis.config.example nemesis.config
Edit the nemesis config, for a basic setup, you’ll only need to change the nemesis_http_server which you’ll set to use the IP of the machine you’re running this on. Everything else you can keep as default if you want, or edit it to your specifications. We’re going to keep it mostly default for now.
When you’re finished run the following command:
python nemesis-cli.py --config nemesis.config
Press enter and accept the default values for now, unless you want to specify the credentials yourself. If not, nemesis will autogenerate random credentials.
Take note of these, and store them somewhere safe.
The nemesis documentation recommends running
skaffold run -m nemesis --port-forward=user
However, they also note that you may encounter some timeout issues when running this command on slower internet speeds. So to skip the middle man, go ahead and run these commands instead:
./scripts/pull_images.sh

skaffold build
Get comfortable, this should take a minute. If the skaffold build command fails for some reason, just re-run it, it should succeed the second time.
This performs the 2 steps the previous command ran manually, while eliminating the risk of it timing out.
Finally, we should be able to run
skaffold run -m nemesis --port-forward=user
Like the documentation says, and get a fully stood up nemesis. You should see the following on your screen assuming everything set up properly.
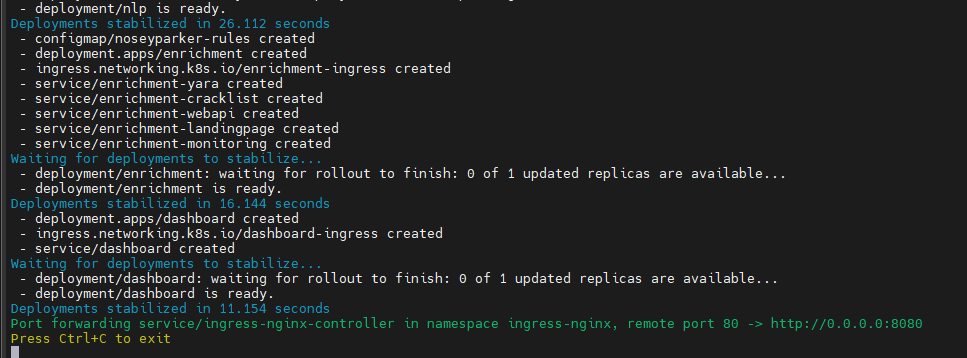
You should now be able to log into the Nemesis interface at http://your.ip.add.ress:8080
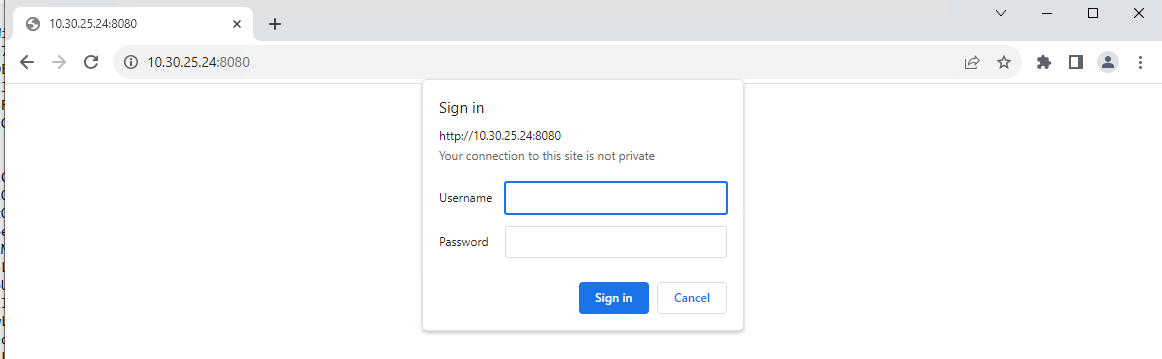
Enter the Nemesis basic auth credentials that were spit out when you ran the nemesis-cli.py script and you should see a pretty minimal UI.
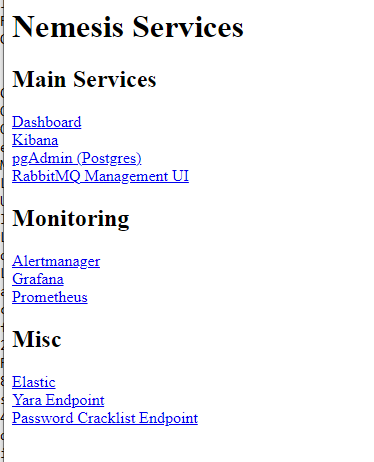
Click Dashboard and you’ll be brought to the main Nemesis Dashboard, which you can authenticate using the dashboard_user and dashboard_password from before.
Congratulations, you now have a basic Nemesis set up that you can begin testing against!
Future posts about this I’ll likely talk about using it operationally with my favorite red team tools.